If you use QuickBooks Online Essentials, you may know that you cannot assign expenses to customers or jobs (what QBO calls sub-customers); this is a feature that is only available in QBO Plus or Advanced. What if I told you that you can get a Profit & Loss by job by using tags in QuickBooks Online Essentials for Job Costing?
I swear, you can do this, and I’ll show you how.
The first thing is making sure that we have tags turned on in two places.
Go to the Gear Icon > Account and settings > Sales tab and in the Sales form content section, click the pencilicon, then toggle Tags to on. Click the Save button:

Now, in the Expenses tab, click the pencilicon in the Bills and expenses section, and toggle Show Tags field on expense and purchase forms to on, then click Save:
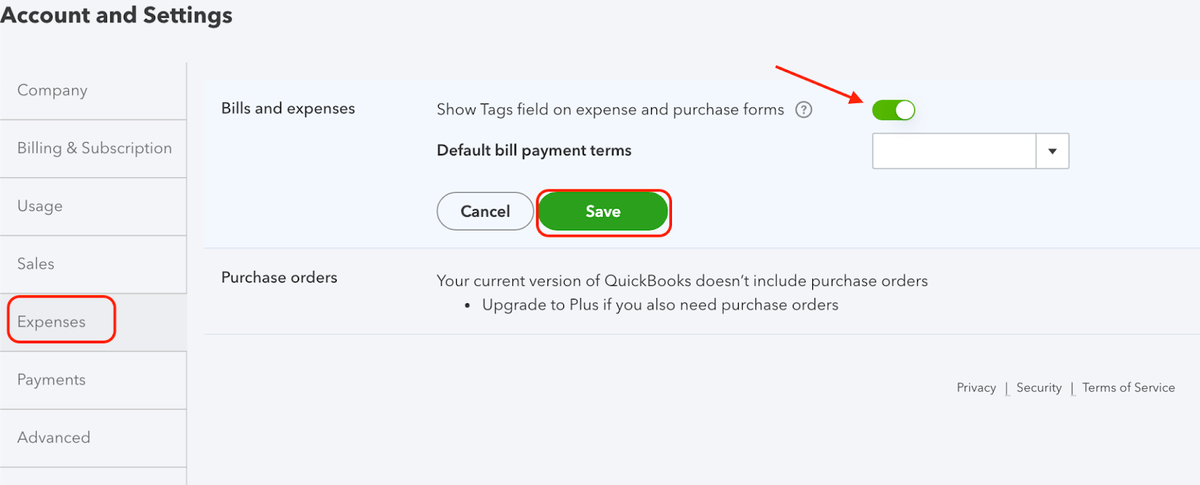
Once you do that, click the Done button in the bottom right corner of the Account and Settings screen to exit.
Great! Now we need to make sure we have our customers and jobs entered. I’m not going into detail about that, but you can check out this page in the QuickBooks Community for a video and instructions, if you’ve never entered a customer into QBO.
We have ours all set; a parent customer with two sub customers/jobs:

Get Profit and Loss reports in QBO Essentials by using tags in QuickBooks Online Essentials for Job Costing
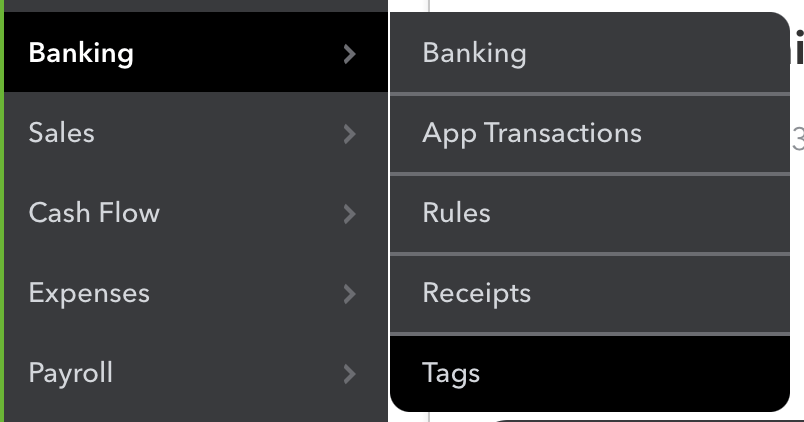
You’re probably wondering: “I thought this was about using tags in QuickBooks Online Essentials for Job Costing?” – and this is the part where we set up the tags. To do this, from the left nav, click Banking > Tags. (FYI, I don’t know why Tags are in Banking…)

You can also get there this way:
Because we know we have one customer and two different projects that we’re working on for them, we’re going to create a Tag Group that is the same name as the parent customer, and a tag for each of the sub customers/jobs. We’ll click the green New button from the Tags center, then choose Tag group and enter the customer name:

We add the name and (I love this!) get to choose a color for this tag. While we’re in this screen, we have the option of adding our tags for each of the sub customers/jobs as well, but only after we click the green Save button:

Once I hit that save button, I can now add tags without leaving this screen but entering the name (the same as the sub customer/job I’ve already added) and clicking the Add button:

Just click the green Done button in the bottom right to get back to the Tag list/center.
Tags can also be added from the Tag list by using the green New button like we did when adding the Tag group, or by dropping the arrow down in the Action column for the Tag group in which you want to add the Tag and choosing Add Tag:

Now that we have our tag group (Customer name) and tags (sub customers/jobs) set up, we can start adding tags to transactions. Be aware that there are limits: 40 Tag groups and 300 tags, regardless of what subscription level of QBO you have.

We can’t add tags to specific line items, but you can add multiple tags. So if you have a transaction that needs to split between two customers or sub customers/jobs… you’ll have to enter two separate transactions and tag accordingly. Not ideal, but using tags in QuickBooks Online Essentials for Job Costing is a workaround for users that don’t have QBO Plus or Advanced so… ¯_(ツ)_/¯
Here’s an invoice with a tag assigned:

And here is an expense with a tag assigned:
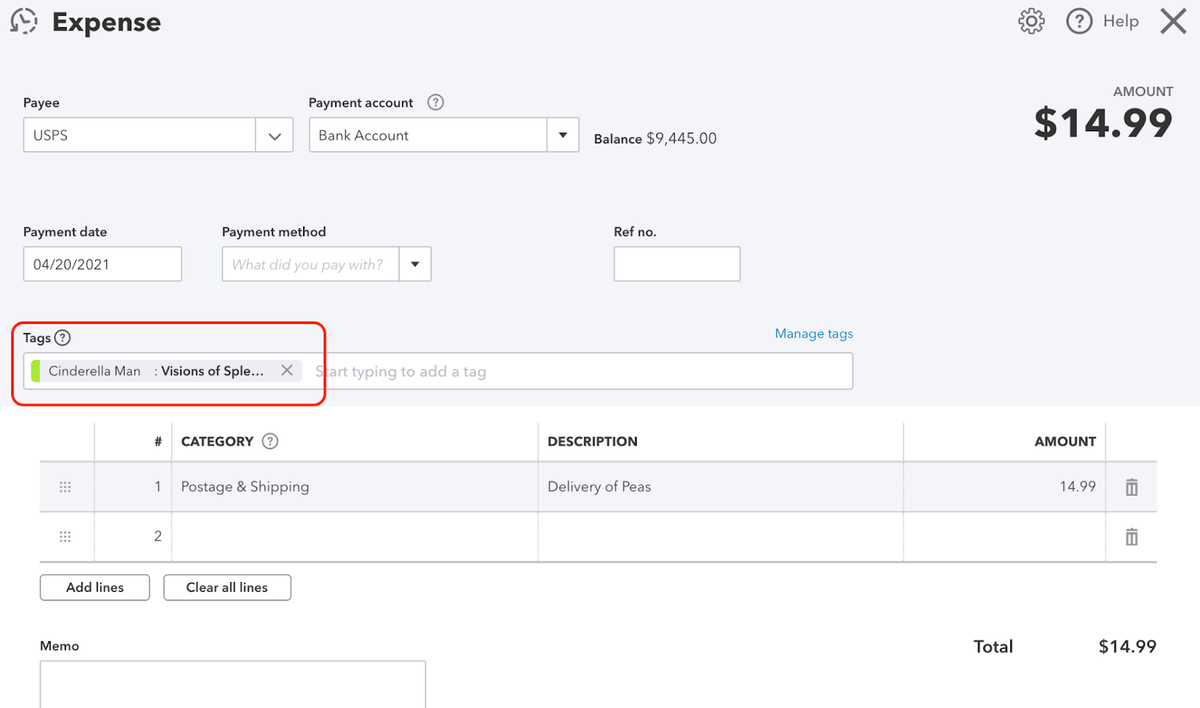
As you work on each job, you’ll assign the tag for any expenses related to the project, and the reporting is available from the Tag List (Center?) by choosing Run report from the action column:

Reports can also be accessed by going to Reports > Business Overview > Profit & Loss by Tag:

A couple of notes about reporting:
- When generating Tag reports from the Report Center, the reports came up blank, even when the date range is set to All Dates. This is because the default report filters by “Ungrouped tags”. This can be remedied easily enough by clicking on the Customize button and then selecting the Tag Group from the drop down in the “Group by’ field. See image below for this customization.
- Clicking “Run Report” on the Tag group from the Tag list will open a Transactions List by Tag Group report
- Clicking “Run Report” on the Tag from the tag list will open a Profit and Loss by Tag Group report, filtered for just that tag (yes, the report says “Tag Group” even though it’s filtered

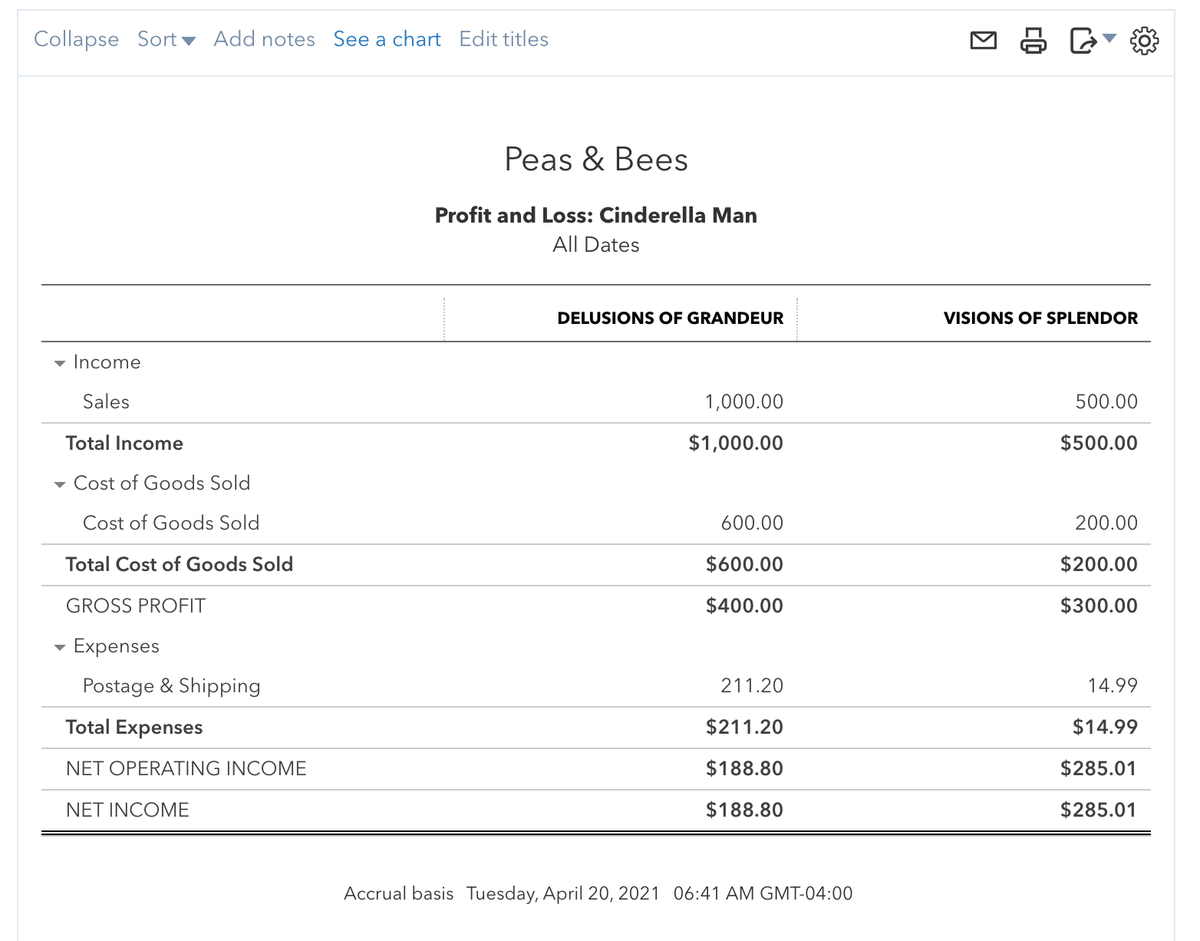
Below you can see the beautiful Profit and Loss report by sub customer/job that using tags in QuickBooks Online Essentials for Job Costing will produce.This report was created from the report center and customized as mentioned in #1 above; the title has also been changed to show the parent customer:
