I’ve had quite a few clients ask about using late fees in QuickBooks Online lately, so I thought I’d write an article about how to set them up and use them.
To start using late fees in QuickBooks Online, we have to go our Gear Icon > Account and Settings and then choose the Sales tab and find the Late Fees section:

From here, you can set up late fees in QuickBooks Online – flat fee or percentage of remaining balance and the frequency (once per invoice, per month, or per day) as well as an optional one time fee.
In this situation, we’re going to set up a 2% per month fee, with a one time $25 fee:

We’re going to give the customers a 7 day grace period before applying late fees in QuickBooks Online. What this means is that if the due date is the 1st, late fees won’t begin accumulating until the 8th:

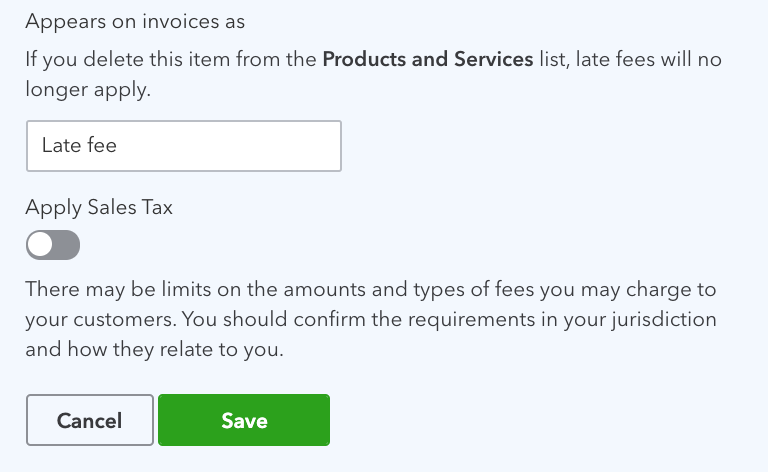
The last steps are deciding what to call these charges on invoices and choosing whether to apply sales tax. We’re going to leave the default “Late fee”, and not apply sales tax, then we’ll click the Save button:
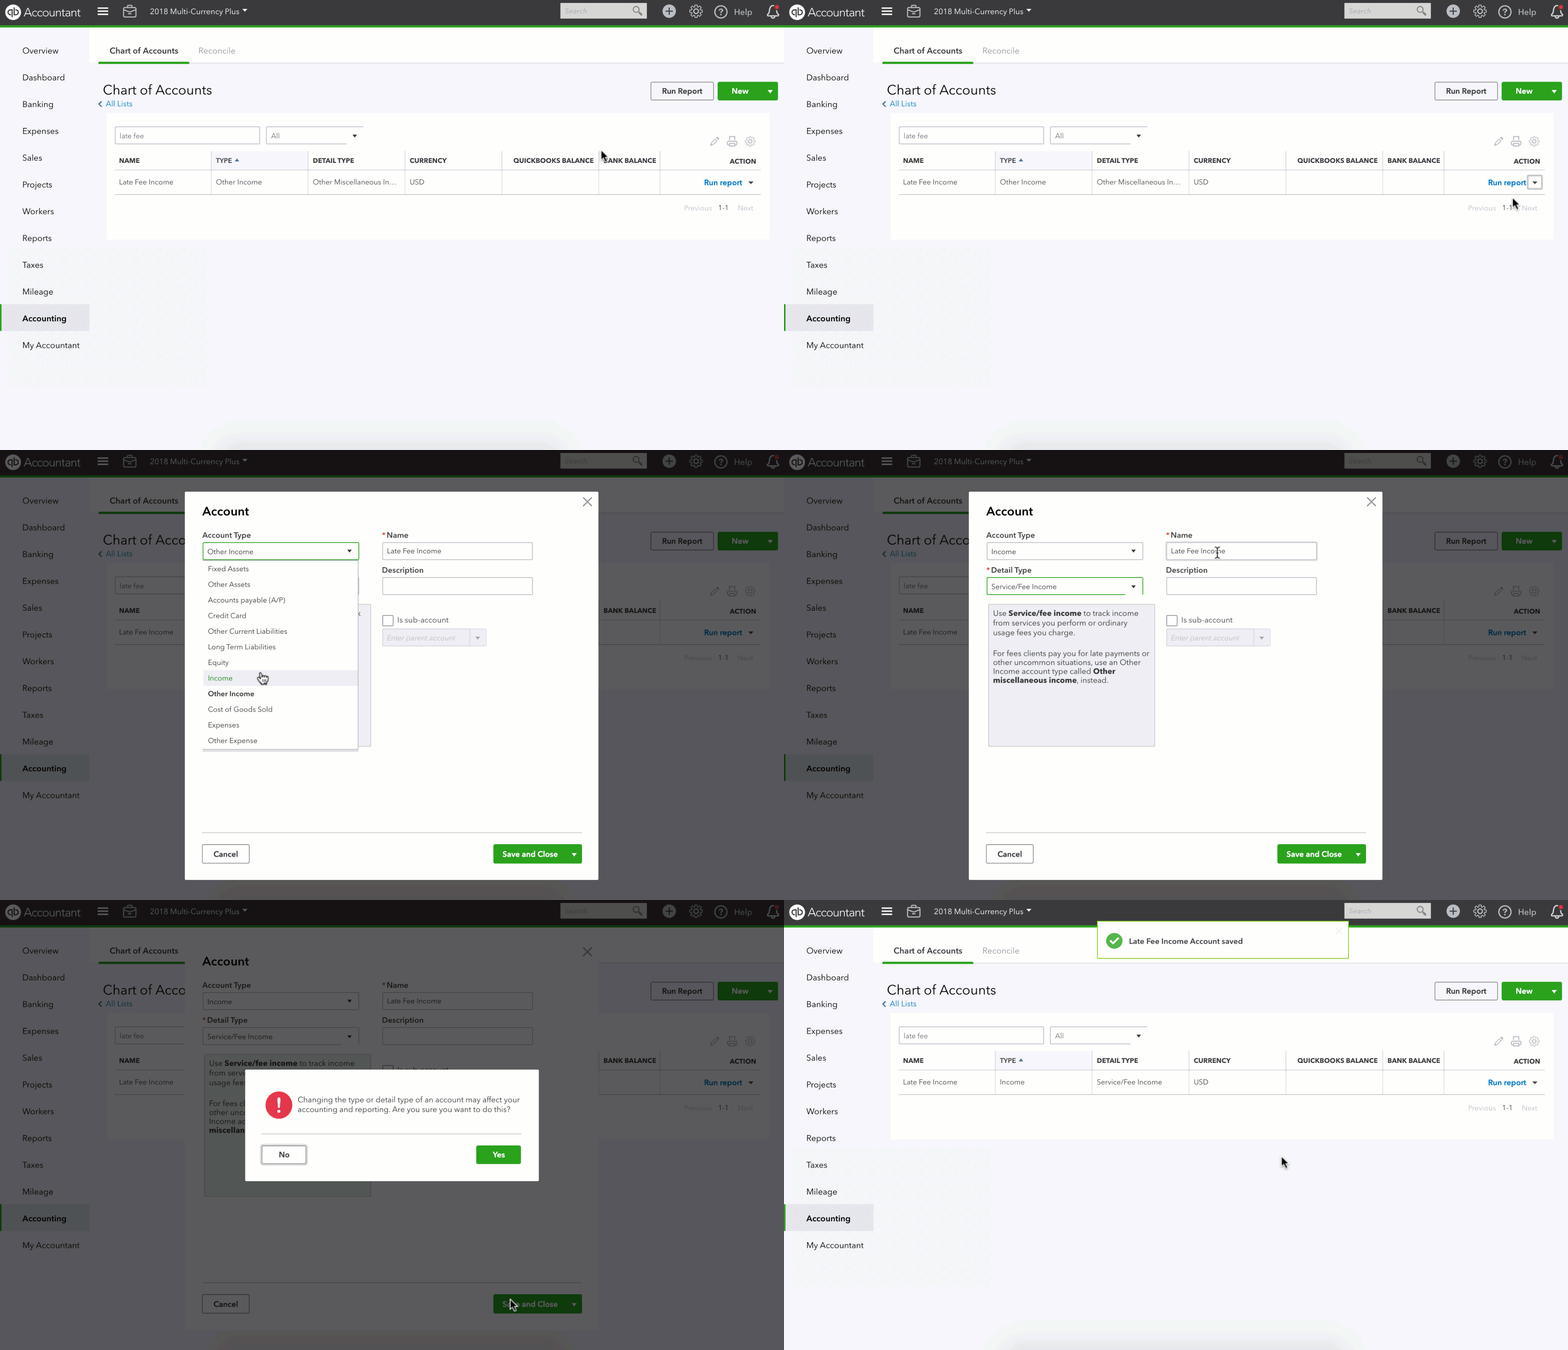
When you click Save – QuickBooks Online will create a new account called “Late fee income”. This account is an Other Income type:
If you’d like, you can edit this account:
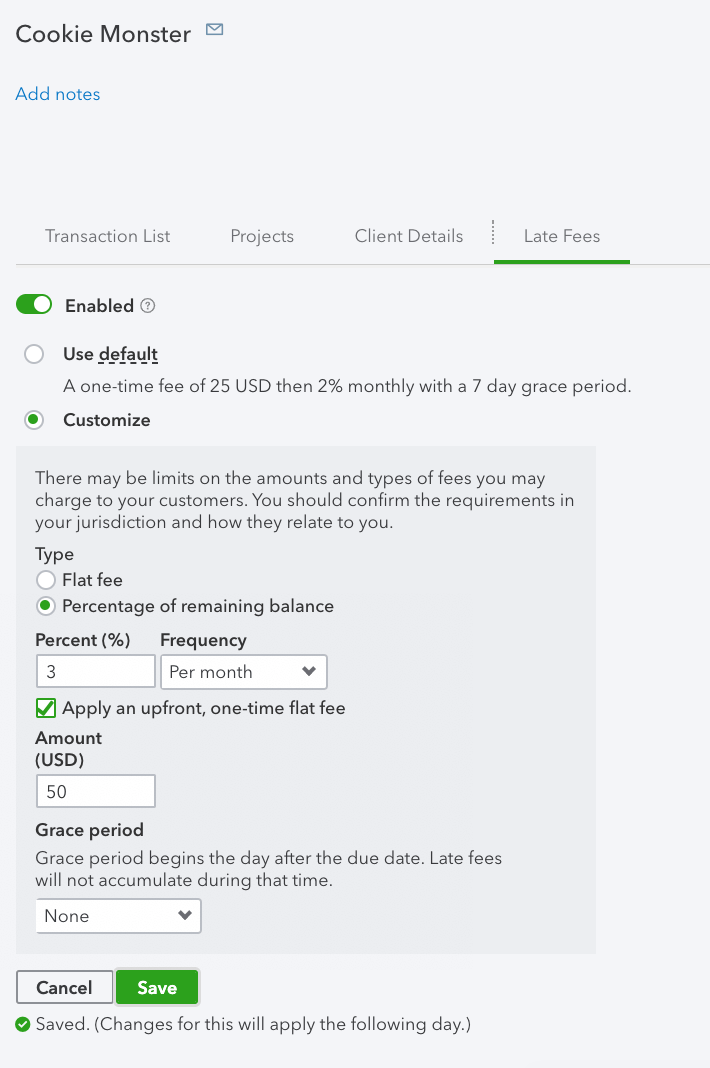
Oh wait – did you mention that you want to be able to customize this, on a customer level? No worries there! We can choose to disable late fees for a customer, or override the default late fees. If we click on the Sales tab in the left nav, then chose the Customers tab (or Clients, or whatever your QBO calls customers) then click on the customer name to get to the Customer Detail page to customize late fees in QuickBooks Online for a specific customer.
For the customer below, we’re changing the 2% to 3% per month, and the one time fee from $25 to $50:
NOTE: Late fees in QuickBooks Online won’t be applied to invoices created before the feature was turned on
They only work for invoices created on or after the feature is turned on. This means that any existing past due invoices won’t have late fees enabled for them. You can tell if an invoice is eligible when you open it. In the header, under the due date, you’ll see this:

For invoices created AFTER late fees in QuickBooks Online was enabled, you’ll see this:

Once you have late fees enabled, when you DO encounter a customer with a past due invoice, you’ll see that invoice automatically updated with late fees added as a line item.
Below, we can see that this customer had the one time $50 fee applied, then 3% per month.
(Note the 3% is calculated on the total of the invoice – the original balance plus the $50 late fee – not just the original balance)

When we look at the Profit and Loss, we can see these in “Late Fee Income”, and they’re in the same period as the original invoice:

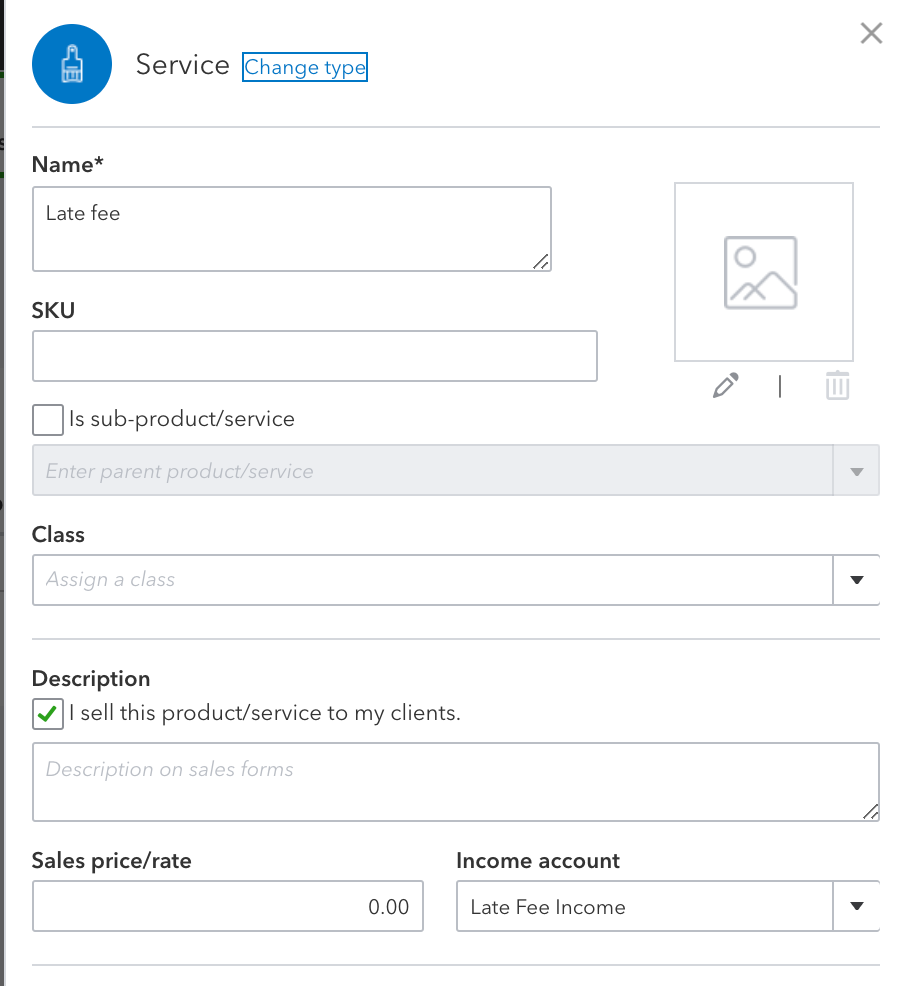
When you enable late fees in QuickBooks online, an item is automatically created and can be found in the Product and Services list.

The amount and description are both left blank, so that when late fees in QuickBooks Online are applied, QBO can add the description and total, according to preferences applied during setup:
If you’ve been using QuickBooks desktop and the late fee feature there, you’ll know that rather than add line items to the original invoice, QuickBooks desktop creates a NEW invoice with “FC” in the reference number to apply late fees. Historically, our clients have found it much more difficult to get these paid and have to be voided. Late fees in QuickBooks Online makes collections much more simple by adding the line items to the original invoice.
Good luck in your quest for speedy payment from customers; hopefully you won’t need to use this feature 🙂


