Intuit recently released Progress Invoicing in QuickBooks Online as a beta test. Here’s how to use it.
If you have the Progress Invoicing beta turned on in your QBO account, this is how you’ll create multiple invoices from one Estimate.
You can download the entire Job Costing in QuickBooks guide here.
We want to turn on the option for the “Due” column and Estimate Summary. (This will only show up when you email the the estimate to a customer.)
To turn on the feature, click Gear Icon > Custom Form Styles
Click “Edit” on the template set to default. In the screen shot below, this is indicated by the form type “Master”:

Once you’re in the edit screen, click the “Content” tab, the click anywhere in the middle section of the body of the template, then the link that says “Show more activity options”:

Now, you’ll check the box next to “Show progress on line items (email only)” and then the “Done” button in the bottom right corner.

By setting this up, the customer will see an “Estimate Summary” on the invoice when you send one create from an estimate.

Now we’re ready to start using Progress Invoicing in QuickBooks Online!
Open the estimate you created (our Estimate #2120), then click “Create Invoice”:
You’ll be asked how much to invoice. We have three choices: the entire estimate, a percentage of each line or a custom amount for each line.

For this job, we’re going to invoice 50% up front and 50% upon completion, so we’ll choose the second option, and enter in 50%, then click “Create Invoice”:

QBO will create the invoice, automatically adding the correct totals for each line item. Make any edits you need to (terms, PO Number, etc), then click “Save and send” to email it to the customer.
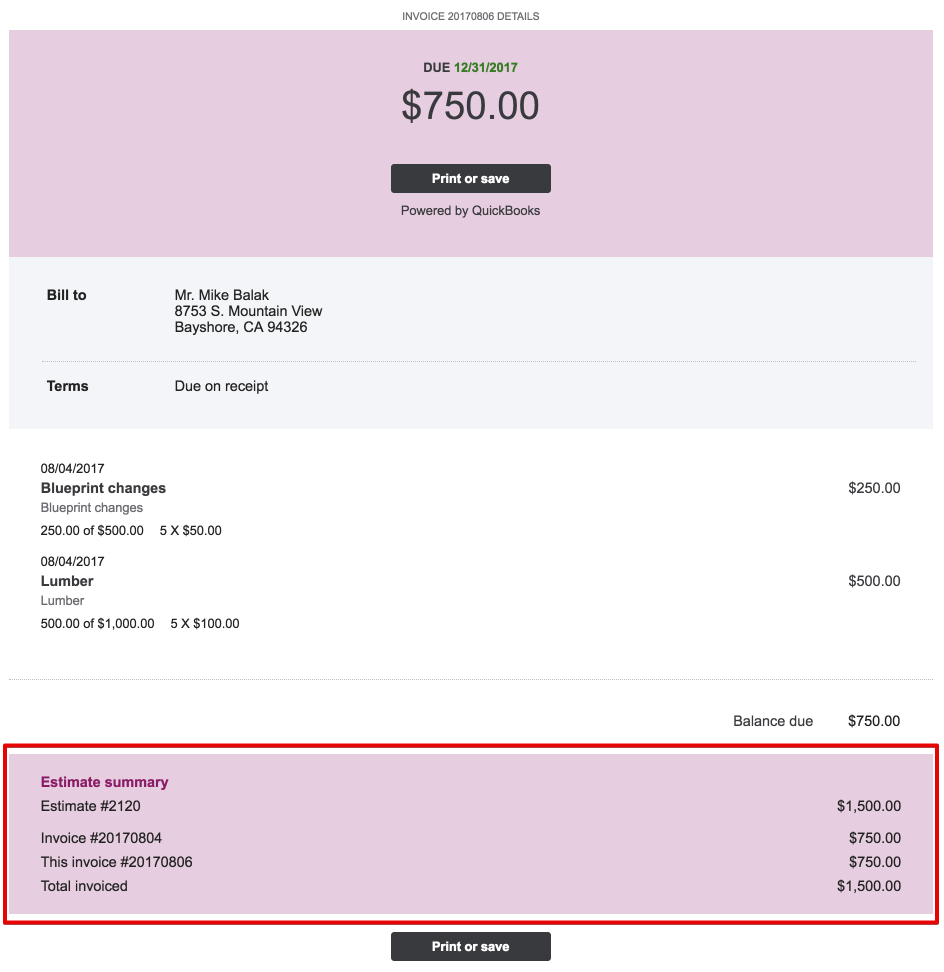
You’ll note that each link item now has a column with a little chain icon, that will link back to the estimate, and the bottom of the invoice includes the Estimate information:

Going back to the Estimate, we can see the Total Amount, the Remaining and the Invoiced columns:

In addition to the Estimate Summary, when the customer gets the invoice, they will see in the line items that they are being invoiced for the percentage/amount:

We’re done with the project, so now we want send an invoice for the remaining amount and close out the estimate.
We’ll go back to our Estimate #2120, and again choose click the “Create Invoice” button in the top right corner.
You’ll notice something different about the options we have for invoicing. Now, instead of having the option to invoice for the total of the estimate, we can now create an invoice for the remainder. This is what we want to do, click “Remaining total of all line = $XXX.XX” and then “Create Invoice”:

Going back to our estimate, we’ll see that it is now closed, and we have two linked transactions:

NOTE: PROGRESS INVOICING IN QUICKBOOKS ONLINE IS STILL IN BETA AS OF THE DATE OF THIS POST (12/5/17).
I’ll keep you posted as to when it gets released into production!


